Tip Me Tuesday - Make Your Own Washi!
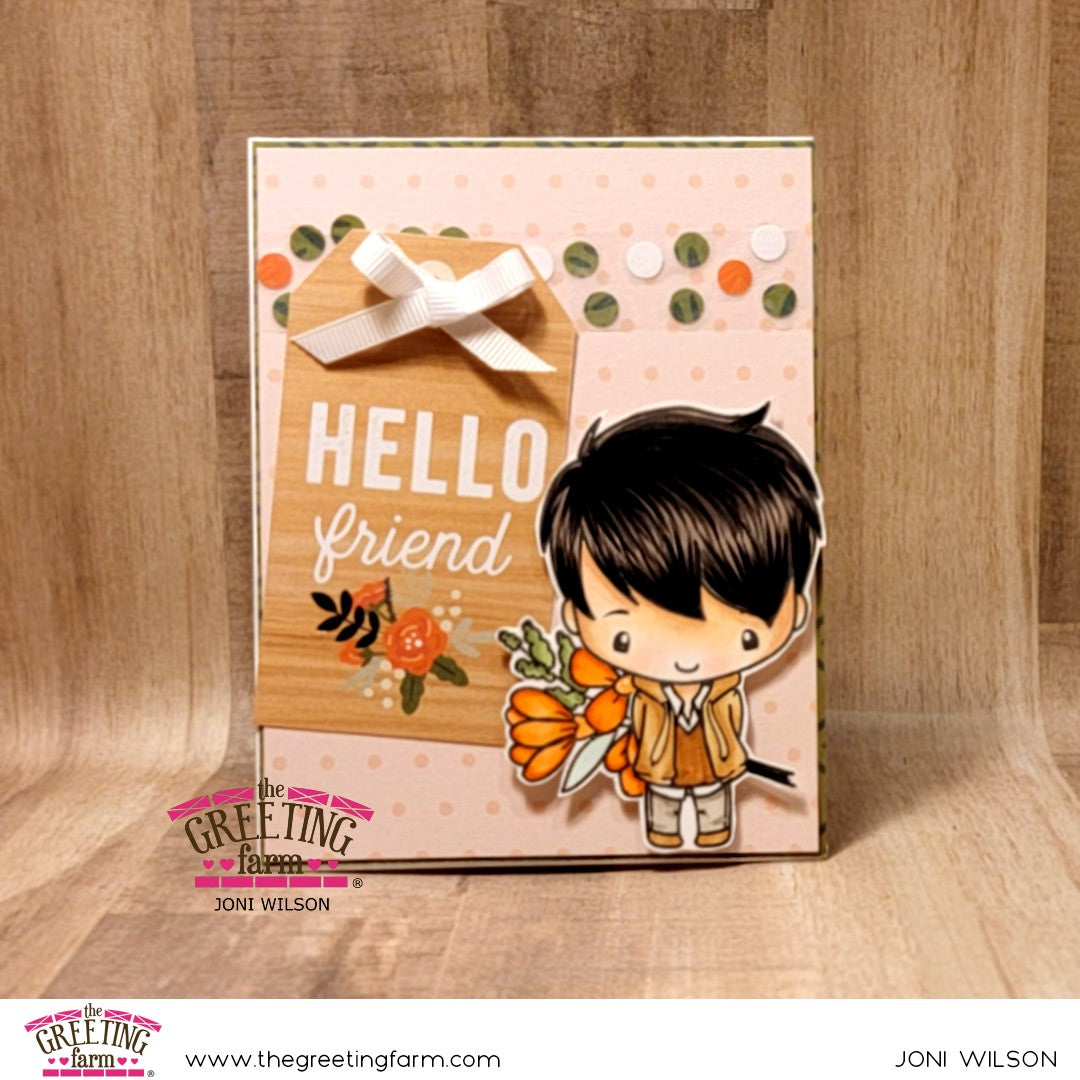
Happy Tuesday, everyone! Today is the first TMT of the New Year, and I am making it my goal to scour the crafty web to find fun and easy tips for us to try. Before a *certain* app was available, then not available, and then available again the next day, I happened to see the cutest little clip on how to make your own decorative washi tape like I did here with Gift Ian:

Oooh I know, this seems like it's obvious but bear with me! I also apologize that I can't give that little video proper credit, as I no longer have that app downloaded. All you have to do is punch out shaped confetti in your color scheme. For my card, I punched out holes using random, matching scraps. Next, arrange them all in a pattern that you desire, in somewhat of a thicker line. From there, take a piece of regular tape (cut to your choice of length), and carefully press down on the line of confetti. That's all there is to it!
Now I have to warn you, if there's a bit of static in the air, the confetti will jump up onto your tape. It scared me the first time it happened, but you eventually get used to it. However, it is easy to rearrange your confetti if it happens to bunch up. Simply use a pair of tweezers (or any craft tool) to move them around. Once you're ready to adhere it, I would suggest to put down a bit of adhesive, just to ensure it will stay in place. (If you decide to use a lot of confetti, then you'll have less of the tape's sticky surface for your card.)
This is such an easy way to customize a decorative element, and so easy to do! I can't wait to see if you try this, or if you've been doing this for a while, I'd love to see your samples. Have an amazing day, friends! Thank you for being you.
xoxoxox,
Joni
Comments
Sue D said:
Cute card and thanks for sharing how to make your own washi tape.